Flux's AI agent is now up to 10x faster and self-corrects in real time, delivering cleaner schematics with less waiting and fewer wasted credits.
This blog breaks down the key tradeoffs between prototyping and production-ready electrical engineering, exploring how power management, RF design, PCB layout, and optimization strategies evolve from flexible, modular designs to efficient, manufacturable products.

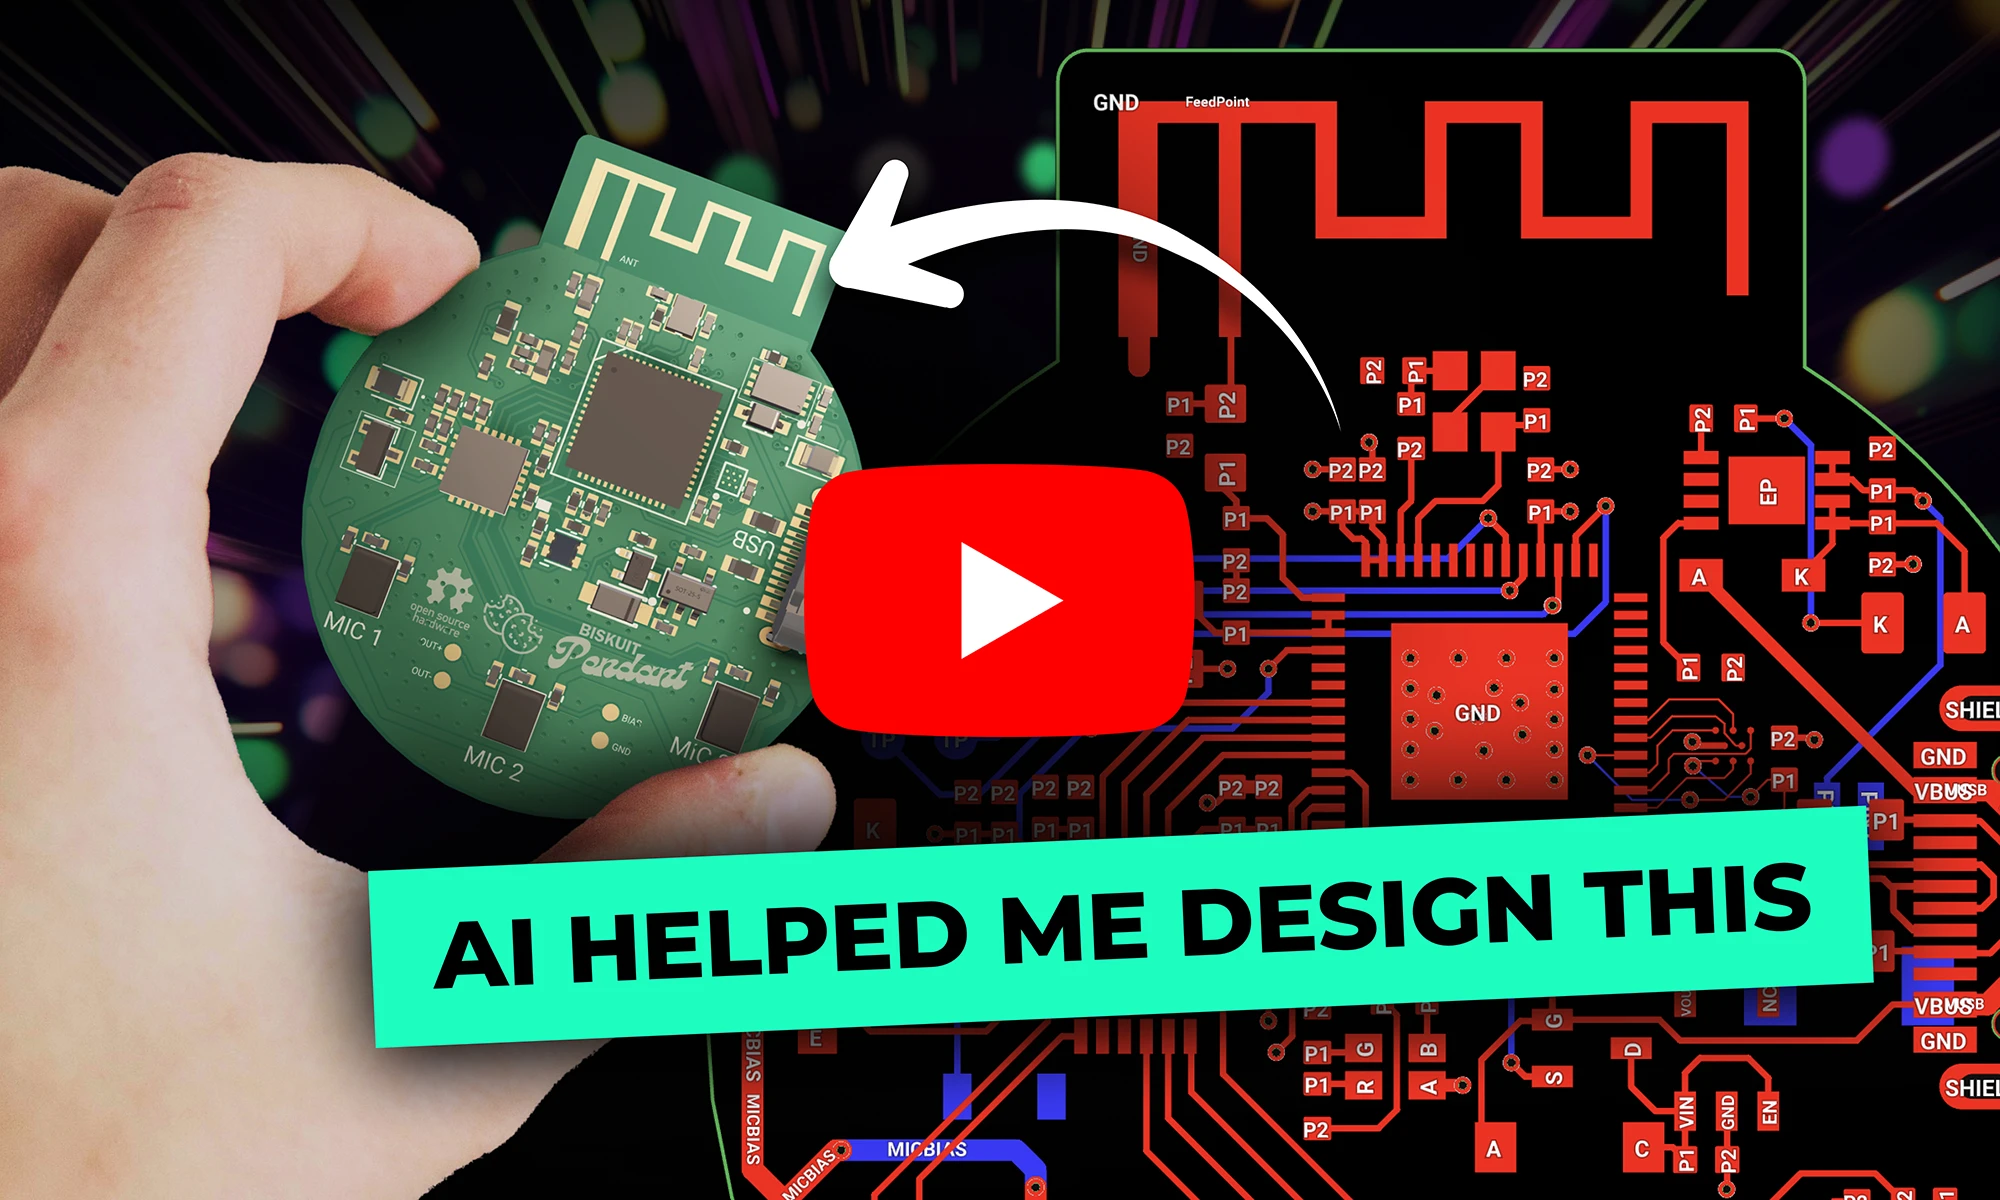
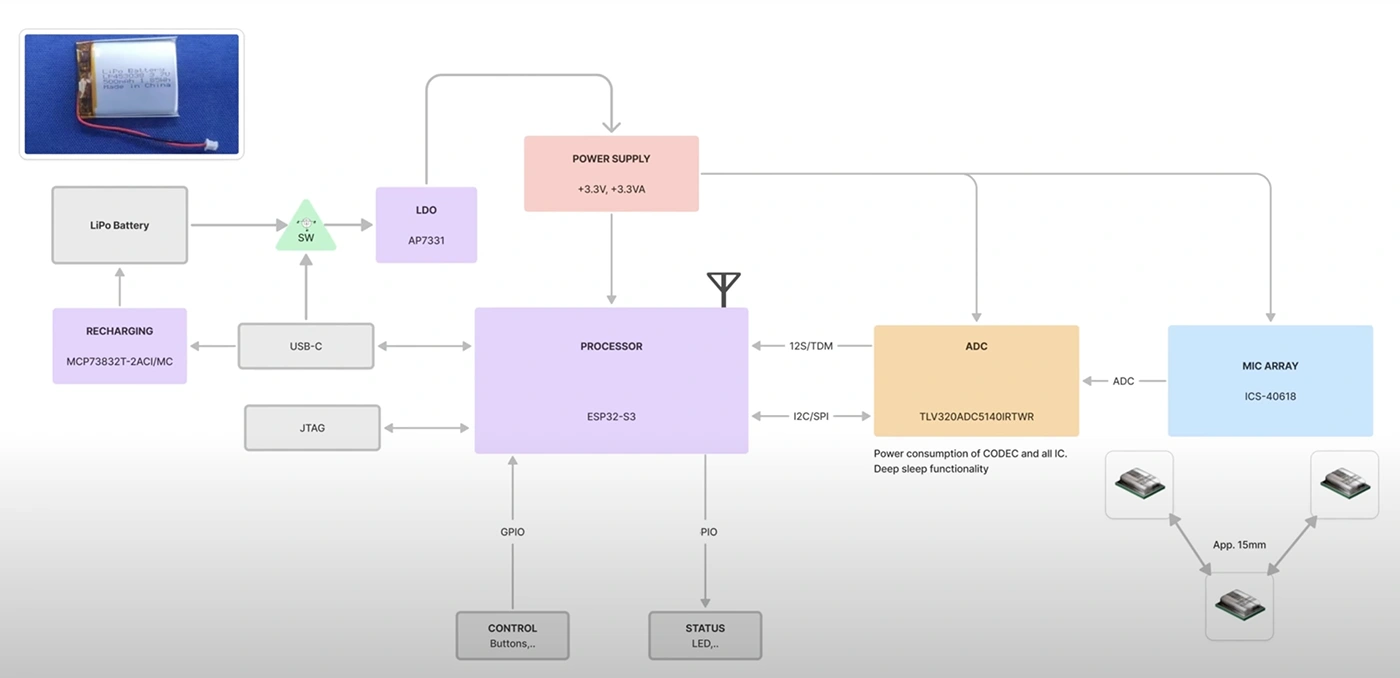
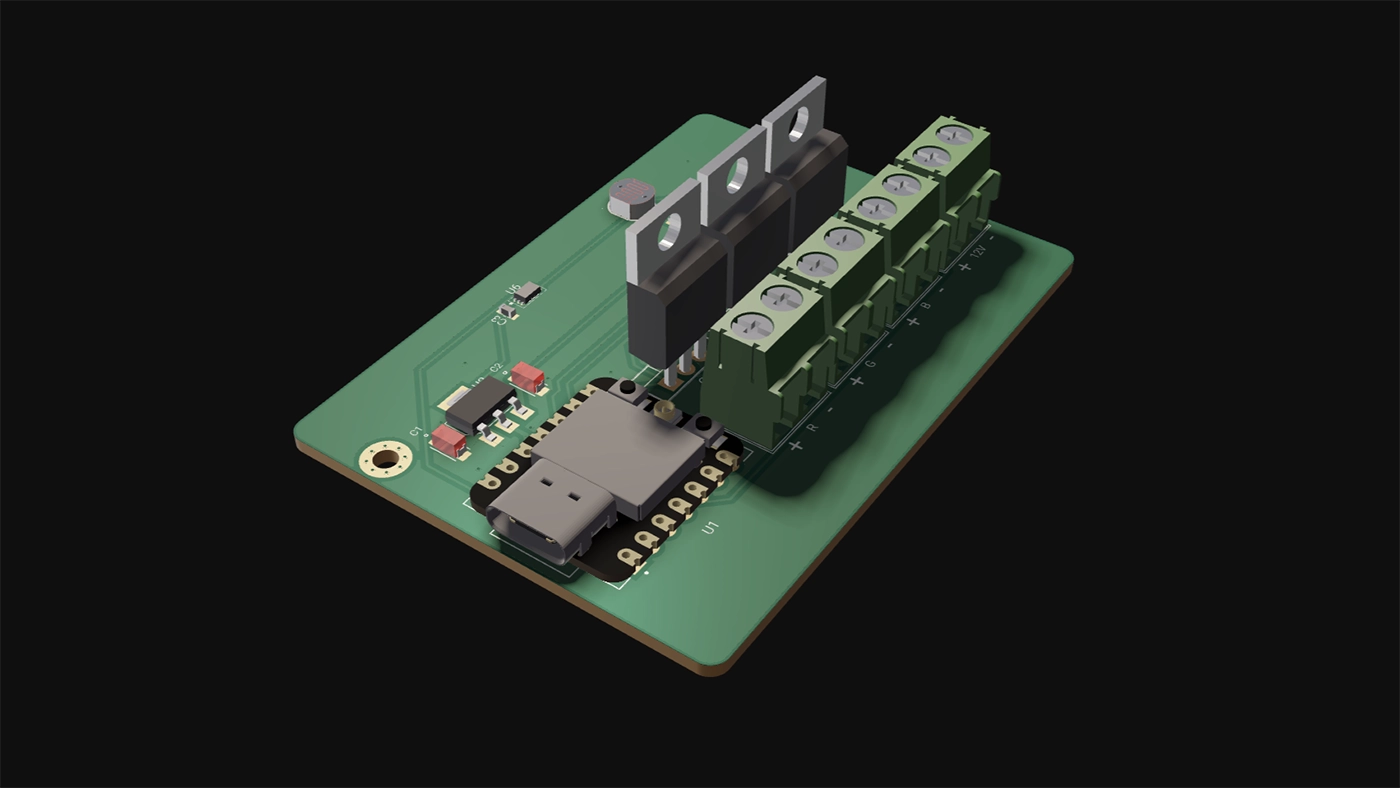
Let's break it down with a case study: a wearable AI pendant built around the ESP32-S3. It packs a microphone array, a LiPo battery with USB-C power, and a PCB antenna into a compact, power-efficient design. How would a design intended for a few prototypes differ from one built for mass production? More importantly, how can a designer transition from one to the other?
A design for prototyping is likely to start with an ESP32 development board, stacking breakout modules for power, audio, and sensors, and wiring everything together on a protoboard. This modular approach speeds up development, allowing rapid iteration and debugging. However, the result is often bulkier and less optimized for power efficiency and performance.
A production-ready design follows a different path. It begins with a block diagram, mapping out power distribution, signal paths, and communication protocols. Instead of separate breakout boards, all functions are integrated into a single custom PCB. This minimizes component count, optimizes trace routing, and ensures better signal integrity, ultimately leading to a leaner, more reliable system.
How to Transition: To move from a prototype to a production-ready design, start by identifying frequently used breakout board components and replace them with equivalent ICs that can be integrated directly onto the PCB. Use search tools like Digikey’s filter or Copilot to narrow the search and check the reference design or application note in each datasheet you are evaluating. Use the prototype to refine the design before committing to a custom layout.
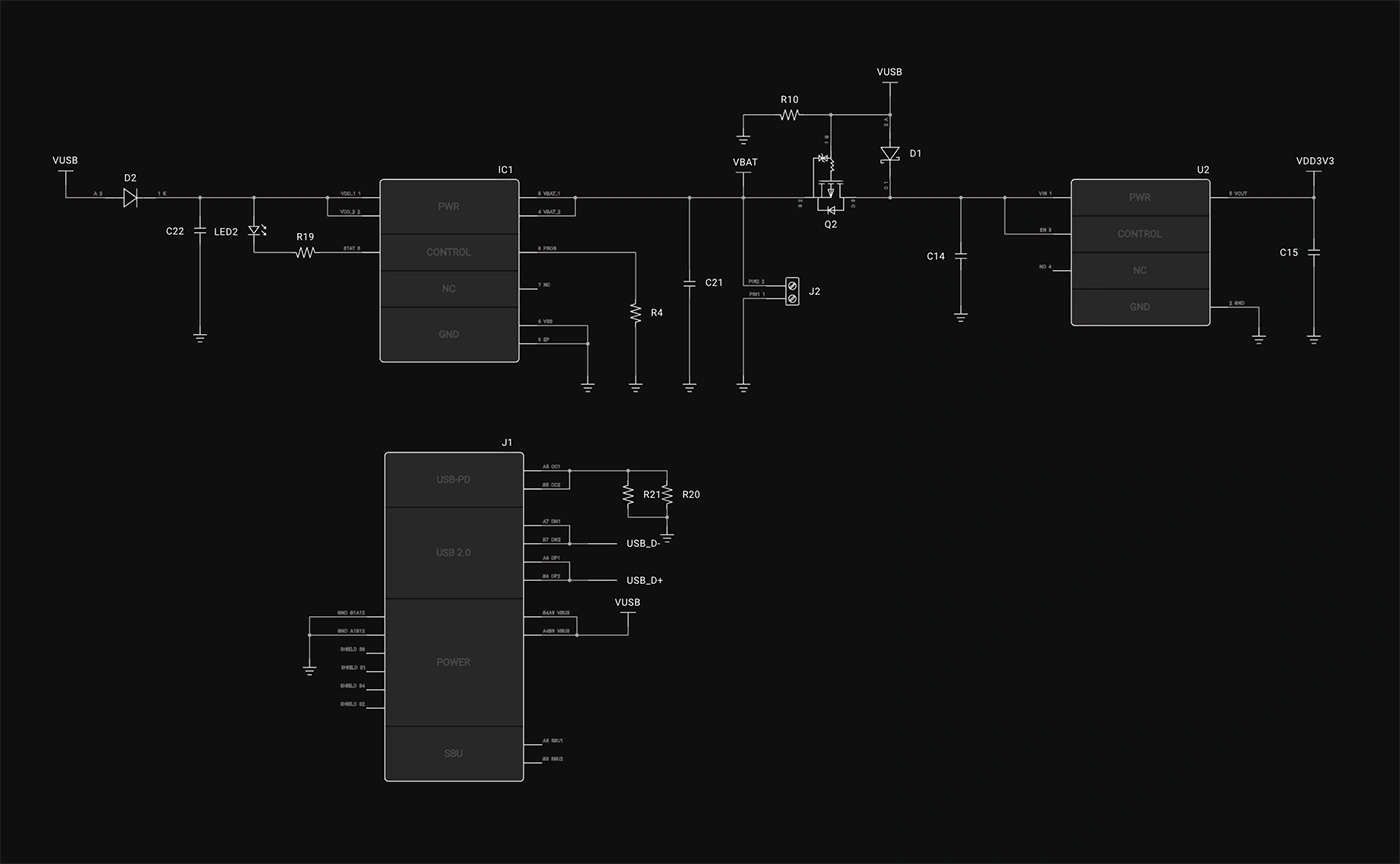
A prototype design might use an AMS1117 linear regulator because it’s easy to wire up and doesn’t require extra components. A generic charging module is typically added, setting up a functional but inefficient system that dissipates excess energy as heat.
A production-ready design optimizes every power stage. The MCP73832T charging IC is chosen with a charge current precisely set based on the battery’s capacity. A MOSFET-based power switch ensures seamless transitions between USB and battery power, while a carefully selected low-dropout regulator (LDO) or buck converter maximizes efficiency, extending battery life and reducing thermal issues.
How to Transition: Instead of relying on modular solutions, select integrated power management ICs suited for your voltage and current requirements. Optimize power paths by minimizing unnecessary regulators and designing efficient layouts to reduce power loss.
A prototype design may rely on the ESP32’s built-in PCB antenna, which works for initial development but can suffer from signal degradation due to poor placement and interference.
A production-ready design requires careful RF planning. The ground plane is optimized, and impedance-controlled traces ensure signal integrity. A matching network is tuned to improve impedance matching, reducing signal reflection and maximizing transmission efficiency.
How to Transition: Follow manufacturer guidelines for PCB antenna placement and matching networks. There are many resources and simulation software's to ensure accurate design like Ansys. Use impedance-controlled stack-ups in your PCB layout to ensure signal stability and range.
A prototype might connect MEMS microphones directly to the ESP32-S3’s ADC, which works but is susceptible to noise. Single-ended connections can pick up unwanted interference, degrading signal quality.
A production-ready design accounts for signal integrity. Differential microphone routing reduces noise, and DC-blocking capacitors are selected to fine-tune frequency response. Impedance-matched traces ensure reliable signal transmission, while an external ADC is used for higher fidelity audio.
How to Transition: If audio quality is a key requirement, incorporate differential microphone routing and external ADCs early in the design. Use simulation tools to validate signal integrity before committing to the layout. Always check the frequency response characteristics of the ADC and Microphone.
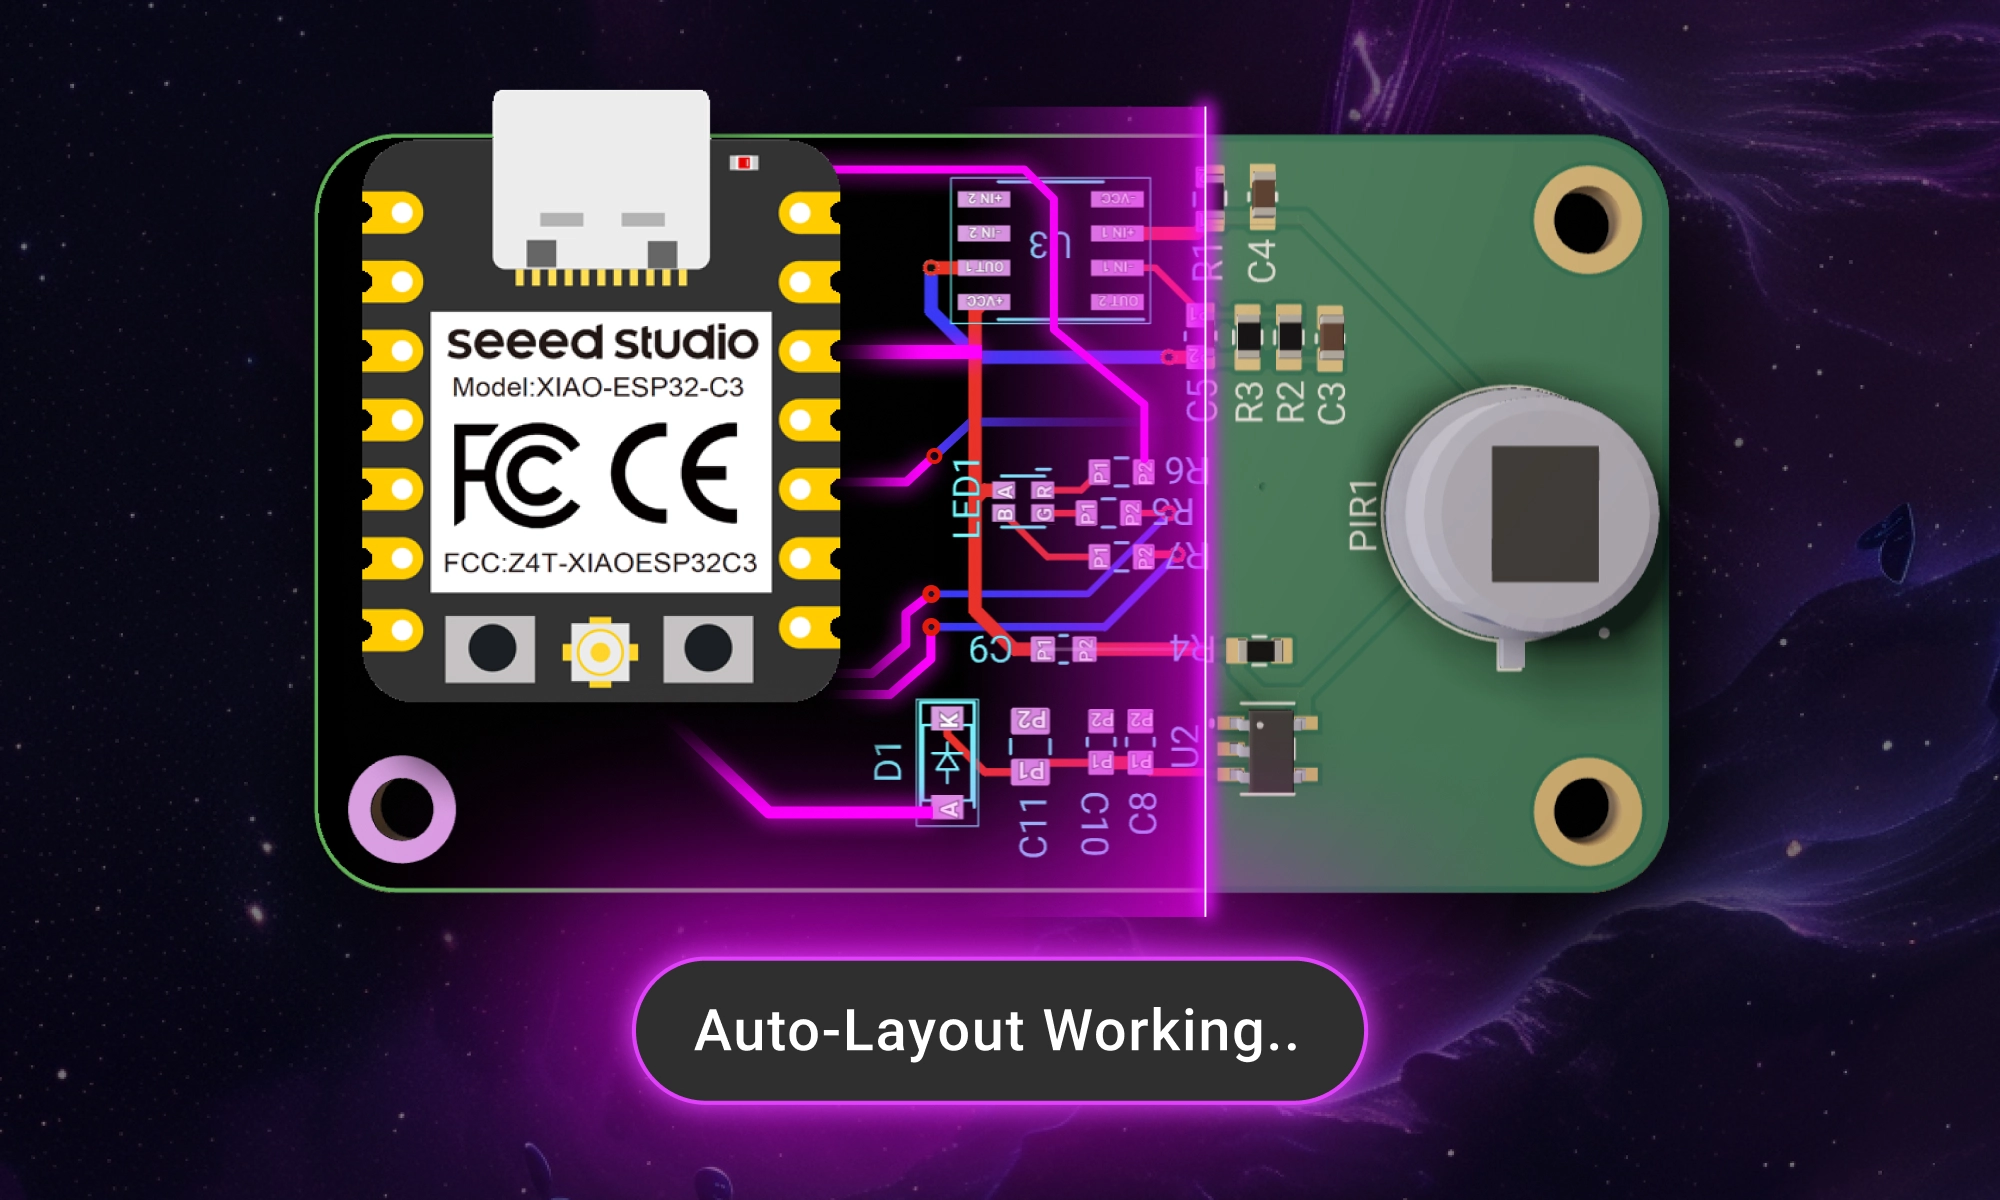
PCB design benefits from automation, but knowing when and how to use AI Auto-Layout is key. A prototype design might rely on auto-routing for the entire board, allowing for quick prototyping and iteration. This speeds up development but may introduce unnecessary vias, tangled traces, and potential EMI issues.
A production-ready design takes a hybrid approach. High-speed, sensitive signals, and power traces are manually routed to ensure signal integrity. Once these critical traces are placed, AI Auto-Layout handles the remaining connections, reducing design time while maintaining quality.
How to Transition: Start by routing critical signals manually, especially high-speed traces and power connections. Use AI Auto-Layout for non-critical traces, ensuring design efficiency without compromising quality.
Prototyping and production-ready designs share the same fundamental principles: understanding tradeoffs, optimizing efficiency, and refining designs. A prototype prioritizes flexibility and quick iteration, while a production design optimizes for manufacturability, longevity, and performance.
Neither approach is inherently better; they serve different purposes. The best designers learn from both worlds. Those developing prototypes can incorporate creative design methodologies, while those working toward production can embrace the structured and precision of integrated design.
At the end of the day, electrical engineering isn’t about rigidly following a set of rules—it’s about making smart, defensible decisions based on the constraints at hand. Whether you're building a quick prototype or refining a production-ready device, the key is knowing the why behind every choice.
Want to see a full breakdown of this project? Check out the complete design walkthrough!
Imagine starting a project with over 800,000+ parts at your fingertips, ready to go without any setup. With Flux community-powered part library, you have everything you need to build at scale —all in one place, with real-time supply chain data, intelligent filters, and powerful AI tools.
As any hardware designer knows, access to the right parts can make or break your design process. When the parts you need aren’t available, you’re forced to create them from scratch or search through endless online resources, slowing down your workflow and increasing the risk of mistakes.
With this launch, Flux is eliminating these obstacles. Our parts library has grown from 180,000 to over 800,000 parts this year alone, making it the largest, most comprehensive library embedded in any ECAD tool. With more parts available, you can now design faster, with greater confidence, and the reassurance that every component you need is readily available and up-to-date.
Finding the right part shouldn’t feel like searching for a needle in a haystack. With our expanded library, you now have access to enhanced filters and a smart ranking system that prioritizes parts based on their relevance and popularity within the community.
Here are some of the powerful filters now available in Flux:
These filters give you the freedom to design with precision, narrowing your search to parts that fit your exact specifications and are available in real-time. No need to jump between different sources to check stock—Flux brings live data right to you.
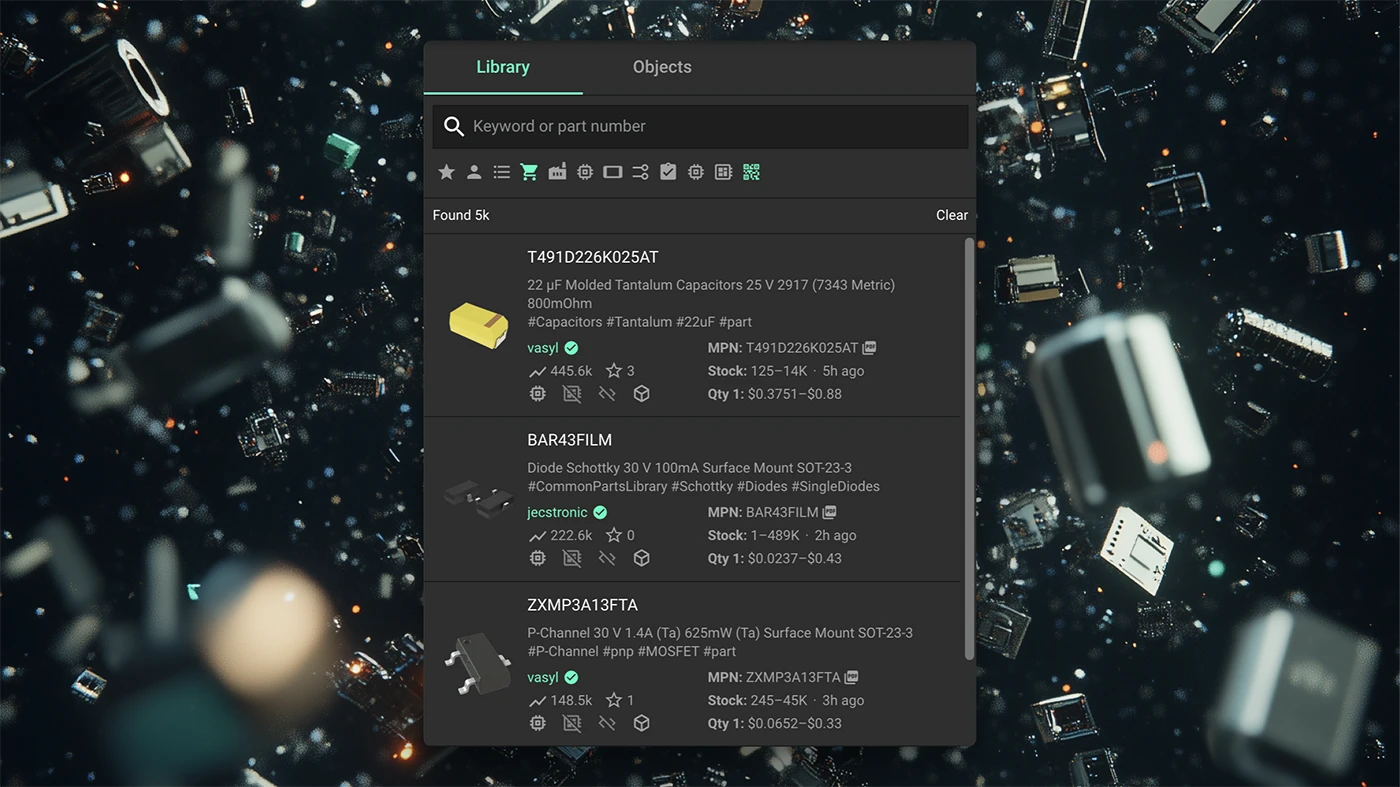
The new parts library also include live data that gives you valuable insights as you build. Here’s what you’ll find:
These improvements aren’t just conveniences—they’re essential tools that save you time and reduce the risk of expensive errors in your design process.
To help you find the best part for your project, we’ve added new, advanced filters that make selection faster and more precise. Here’s a quick summary, but check out our tutorial for a deeper dive:
{{insert-1m-video}}
These AI workflows allow you to optimize your BOM for factors like cost, power efficiency, and compliance—all within the same tool. It’s like having an expert assistant by your side, making every design choice easier.
With 800,000+ parts and advanced tools at your fingertips, Flux is redefining what it means to design with confidence and speed. This expanded library is just one more way we’re empowering designers like you to do your best work, faster and more efficiently.
Open Flux today and start building with instant access to one of the industry’s largest parts libraries.
{{insert-go-to-flux-btn}}
With Flux, you can start with a ready-made project or a tailored template, customize it using Flux Copilot, and then let AI Auto-Layout handle the rest. Once your design is complete, Seeed takes over, fabricating, assembling, and shipping your project—at no cost.
That's why we're partnering with Seeed Studio. Together, we’re making it incredibly easy to bring your ideas to life.
With Flux, you can start with a ready-made project or a tailored template, customize it using Flux Copilot, and then let AI Auto-Layout handle the rest. Once your design is complete, Seeed takes over, fabricating, assembling, and shipping your project—at no cost.
The Seeed organization in Flux has everything you need to get started:
These are complete, functional designs you can use as a starting point:
If you’re building something unique, start with one of Seeed’s board templates. These templates include footprints, pinouts, and configurations, so you can get to designing faster without starting from scratch.
Once you’ve cloned a project or chosen a template, Flux Copilot helps you make it uniquely yours. Adding components, swapping LEDs, or refining connections. You can drop in new parts, and Copilot will automatically guide you through their placement and configuration, ensuring your changes fit seamlessly into the existing design.
It’s like having an expert engineer on your team, guiding you through each step. Learn more about Copilot.
Once your schematic is complete, it’s time to move on to the layout. Traditionally, this step can be tedious and time-consuming, but Flux’s AI Auto-Layout changes the game. Instead of routing traces manually, Auto-Layout optimizes your board in minutes.
The AI intelligently routes components, generating clean, manufacturable designs with no extra configuration needed. During the optimization process, you’ll see multiple iterations of your design as the AI progressively improves the layout. Once it’s complete, you can review and select your preferred version, with the assurance that every option is optimized for manufacturing.
{{learn-auto-layout}}
Here’s the best part: through the LED Remix Campaign, Seeed will manufacture and assemble your project—for free.
Create an LED-based design using a Seeed XIAO board in Flux, then submit to Seeed. Their Fusion service ensures your board is produced with high-quality standards and ready to use. Flux and Seeed work seamlessly together, with templates and ready-made projects optimized for manufacturing from the start. Export your Gerber files in just one click, and let Seeed handle the rest.
What you get:
Ready to design? Here’s how:
With Flux and Seeed, it’s never been easier to design, iterate, and manufacture PCBs. Start faster, and bring your ideas to life.
This blog highlights CES 2025 showcased projects, offering insights on how to recreate them using Flux. With Flux AI-driven design tools, component library, and customizable templates, engineers and hobbyists can build inspired hardware like wearables, drones, EV components, portable chargers, and solar devices.
We believe that these exciting new technologies shouldn’t remain the domain of big companies alone. We’re empowering engineers, students, and hobbyists alike to take inspiration from the best in the industry and create their own hardware breakthroughs. Below, we’ve rounded up five of the most buzzworthy projects from CES 2025, along with tips on how you can use Flux to build your own inspired versions.
Halliday, a newcomer in the wearable tech scene, unveiled its AI Glasses at CES 2025 . These smart glasses are designed to be lightweight and comfortable for everyday use. They feature a unique "DigiWindow" display that projects information directly into the user's field of vision. This display can be moved horizontally across the frame and twisted to bring the screen into focus, ensuring optimal viewing for different users . The glasses also include a proactive AI assistant that anticipates user needs by analyzing conversations, answering questions, and providing additional details without prompting.
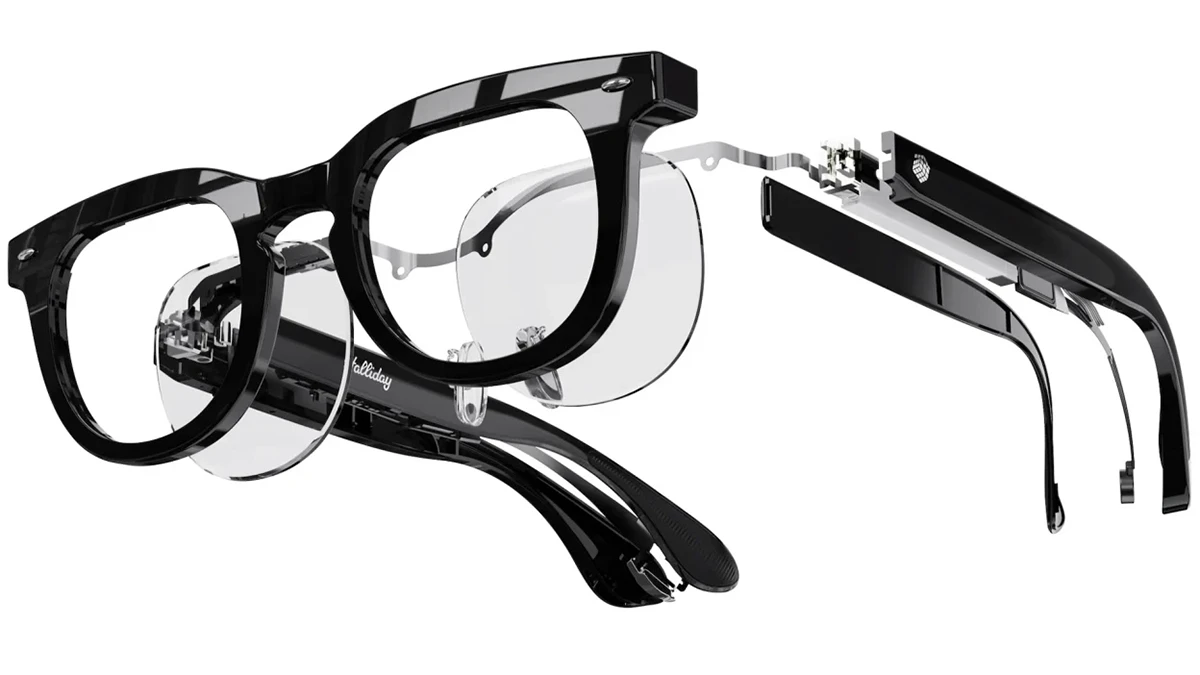
Flux offers a rich component library, including microcontrollers, sensors, and displays, allowing you to jump right into creating AI wearables. Use our AI-driven design tools to plan and design your circuit boards, then check out projects like the Biskuit AI pendant or a wearable AI camera, which features microphones, a camera, and wireless connectivity for running AI models. You can also streamline manufacturing by starting with one of our JLCPCB, PCBWay, or SEEED Studio design templates.
A standout at CES 2025, Alux merges STEM education with eSports through a portable drone and a gamified coding platform. Not only does this drone teach programming in Scratch, Entry, and Python, but it also introduces an “arena” concept for drone-based eSports—allowing competitions and immersive gameplay wherever you go. It’s an ideal solution for tech-savvy students and recreational users eager to learn coding while having fun.
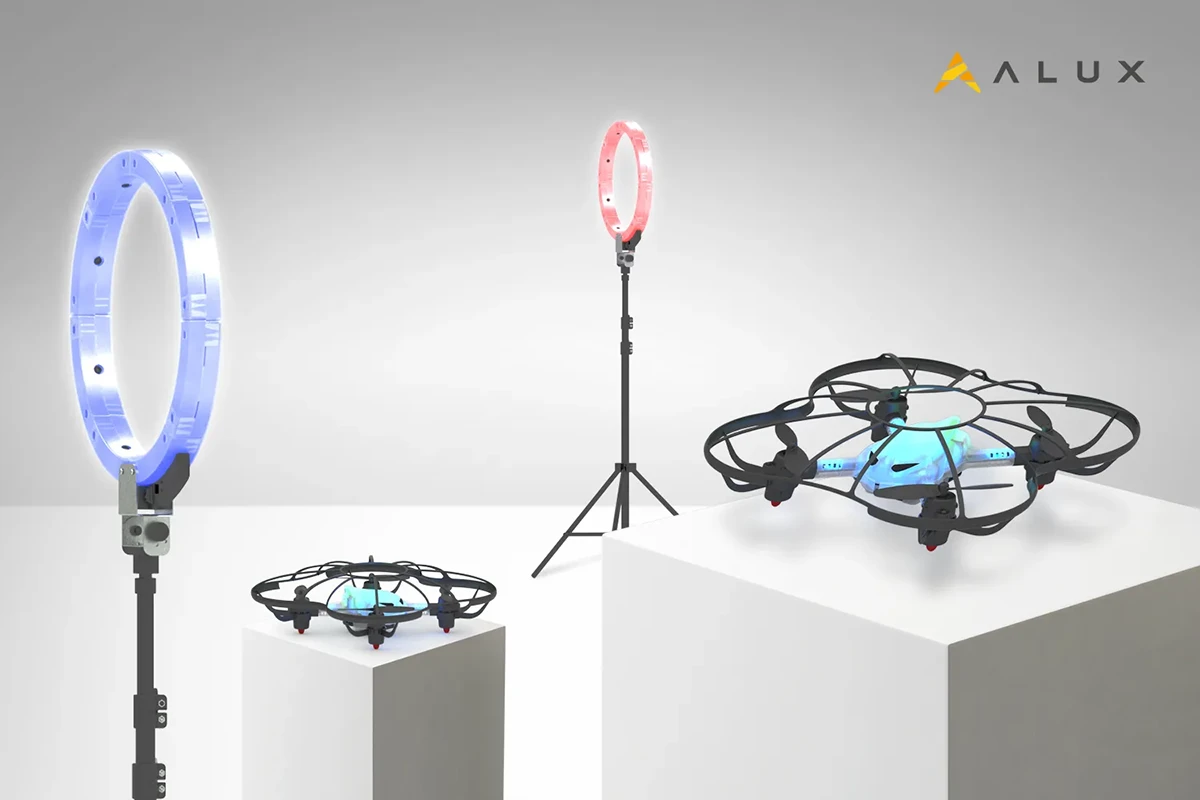
Just like Alux’s portable coding drone teaches programming through Scratch, Entry, or Python, you can take your drone education to the next level by designing and building a custom drone on Flux. It’s a hands-on way to deepen both your software and hardware skills.
Clone an existing project like this quadcopter template or our STM32F4 Flight Controller Template to get a proven setup. Customize your flight controller, add sensors, and integrate AI capabilities using Flux’s schematic editor and AI-driven layout tools.
Honda Zero is the iconic automaker’s latest entry into sustainable personal mobility. Unveiled at CES 2025, this sleek electric SUV combines cutting-edge battery technology, advanced AI-based diagnostics, and a modular design that allows riders to swap out hardware components and upgrade them with minimal hassle. By focusing on zero emissions and high efficiency, Honda is positioning the Zero as a next-generation commuter vehicle for eco-conscious riders everywhere.
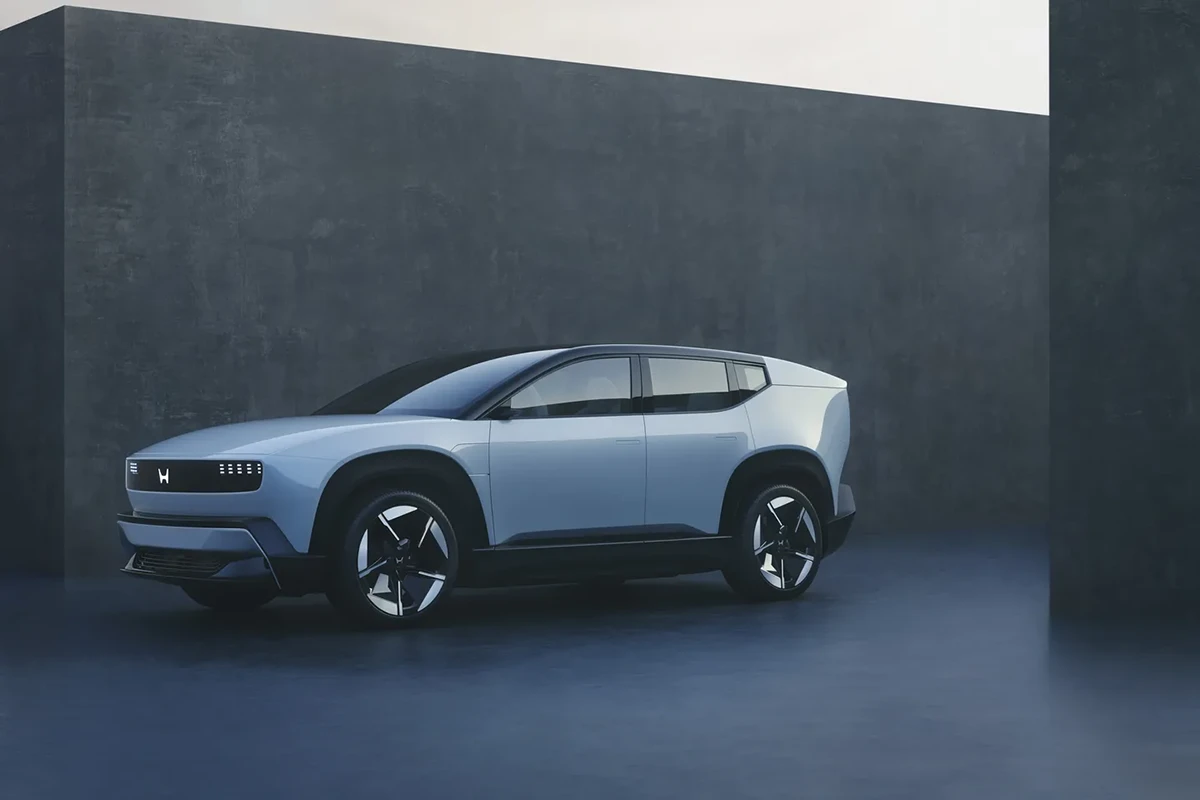
If Honda Zero’s modular and eco-friendly approach has you inspired, check out our resources for creating your own electric ride:
Belkin, known for its reliable chargers and accessories, unveiled the Stage PowerGrip at CES 2025—a versatile portable charger with a built-in handle that doubles as a phone or camera grip. Equipped with multiple USB-C and USB-A ports, the PowerGrip can charge several devices simultaneously. Its ergonomic design, combined with fast charging capabilities, makes it a convenient all-in-one power solution for travelers, content creators, and everyday users alike.
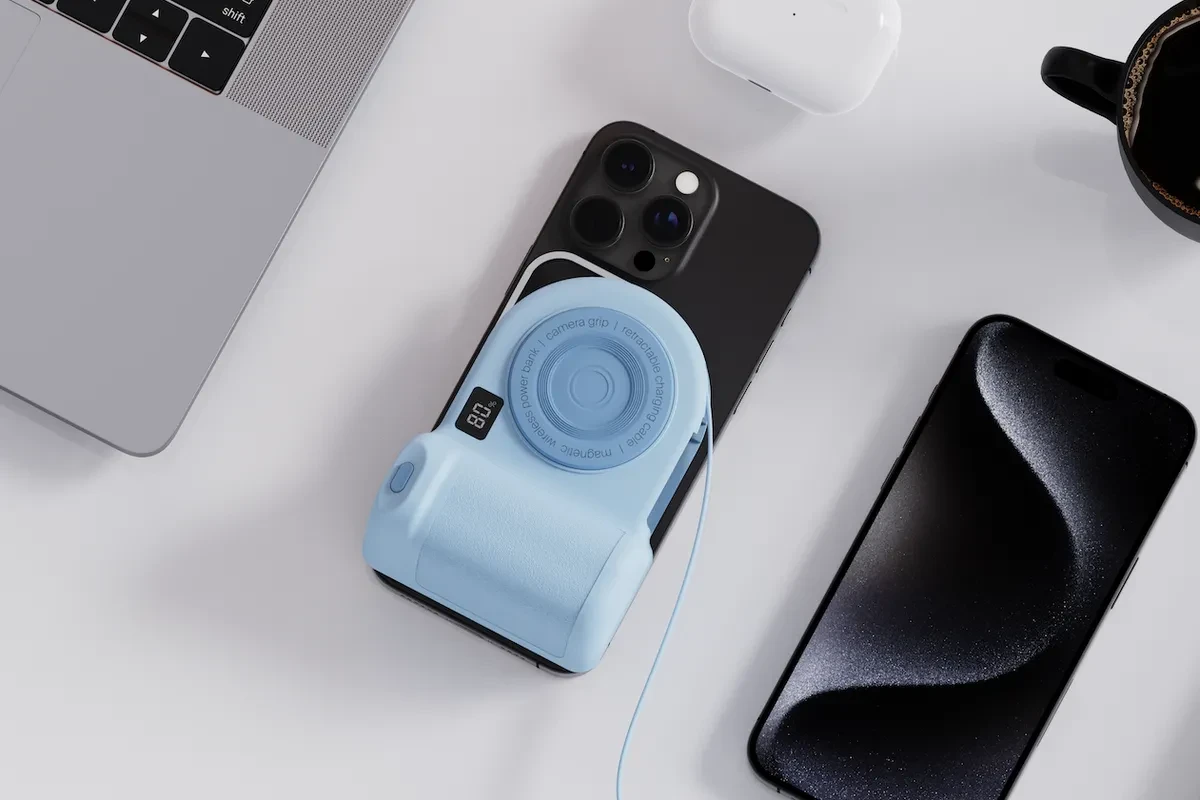
Inspired by the Belkin Stage PowerGrip? Flux has you covered with resources to design and customize your own portable battery packs:
Jackery, a renewable energy company, unveiled its solar-powered roof tiles at CES 2025 . These innovative tiles are designed to be durable, weather-resistant, and visually appealing, offering a sustainable energy solution for homes.

Jackery’s solar roof tiles are a fantastic look at the future of residential energy solutions, but you don’t need an entire roof to start building a solar project of your own. Flux provides a robust platform for designing and prototyping everything from small-scale off-grid systems to more complex solar infrastructure.
CES 2025 was a showcase of incredible hardware innovation, with AI, sustainability, and wearable technology taking center stage. From Halliday’s AI Glasses reimagining wearable computing to Honda’s EV demonstrated the potential of eco-friendly personal transport, the future of hardware is here.
Flux empowers you to be a part of this exciting evolution. Our platform provides the tools and resources you need to explore and contribute to these emerging technologies. Start forking templates, designing custom PCBs, and integrating cutting-edge components to bring your own hardware visions to life.
Explore Flux's featured projects, component libraries, and AI design tools to start building the future of hardware today!
Streamline PCB development with NextPCB templates in Flux, featuring pre-set constraints, AI-assisted layouts, and seamless manufacturing transitions.
The latest addition to this library comes from our collaboration with NextPCB. Their new manufacturing-ready templates provide pre-configured fabrication parameters, reducing guesswork and ensuring a smoother transition to production.
Starting from a blank PCB layout means manually setting up constraints, verifying design rules, and ensuring compatibility with fabrication processes. NextPCB templates in Flux handle these steps upfront, allowing you to focus on circuit design rather than manufacturability concerns.
We’ve worked with NextPCB to create a range of templates suitable for different PCB complexities and applications:
{{nextpcb-templates}}
To demonstrate how these templates streamline the design process, we developed a compact IoT-enabled sensor board using one of the NextPCB templates in Flux. This design also takes advantage of NextPCB’s latest Accelerator campaign, which subsidizes users who incorporate the RP2350 microcontroller.
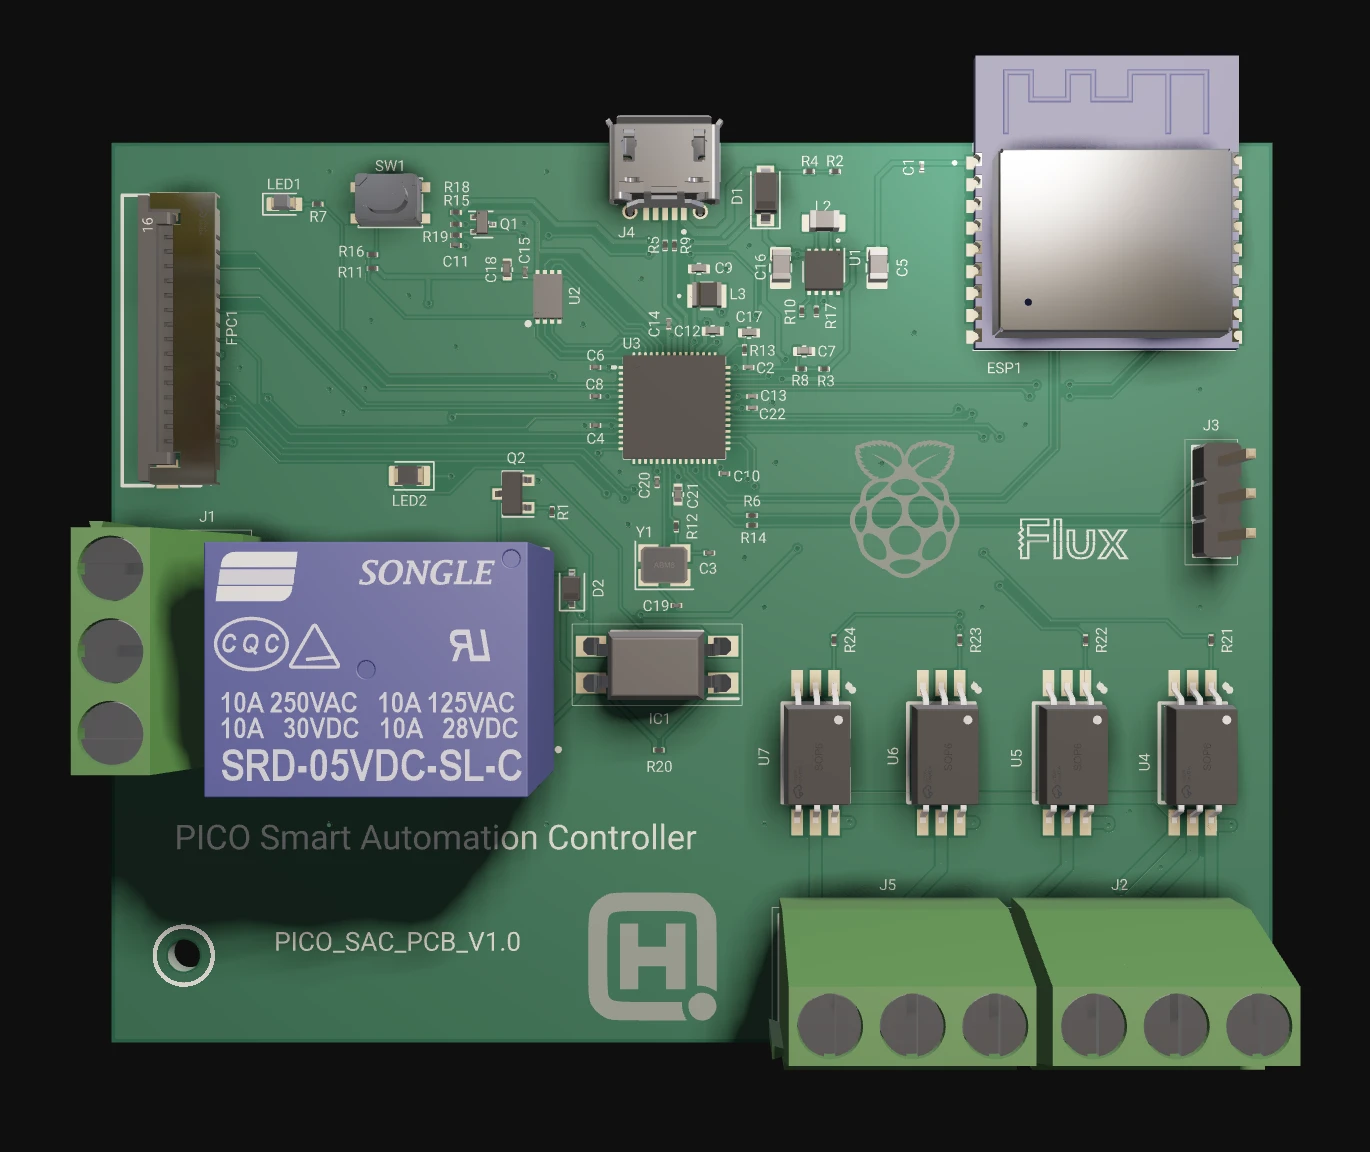
This example highlights how pre-configured templates simplify PCB development, allowing you to iterate and prototype more efficiently.
Once you’ve selected a template, Flux Copilot and Auto-Layout streamline the design process, allowing you to focus on functionality rather than manual layout work.
Once your design is finalized, NextPCB templates make the transition to manufacturing straightforward. With a single click, you can export your Gerber files, ensuring they align with NextPCB’s fabrication requirements. This eliminates compatibility issues and speeds up the production process.
NextPCB has recently upgraded its PCB Assembly Quote System, allowing for instant, automated cost estimation. This removes the need for manual review, significantly accelerating the quoting and ordering process.

For more details, visit NextPCB’s official ordering guide.
Leveraging pre-configured templates optimizes your PCB design workflow by integrating manufacturing constraints from the outset. You can iterate faster, reduce potential errors, and ensure manufacturability without additional design rule verification.
Flux already offers a wide range of templates from leading manufacturers and community contributors. If there's a specific template you'd love to see added, let us know! We’re always looking to expand our library with designs that help you build faster and smarter.
{{nextpcb-templates}}
Explore more than 20 new Flux Copilot prompts for hardware design. Accelerate brainstorming, component selection, validation and design review to streamline your PCB design.
A lot has happened since then. Thanks to your feedback, we’ve been able to improve Copilot and add even more capabilities. Now you can use Copilot for brainstorming, selecting components, performing calculations, researching and selecting parts, managing BoM, and even validating designs.
We realize that writing a good prompt can be tricky, so we’ve refreshed our list of popular prompts so you can copy and paste, or modify for your own use!
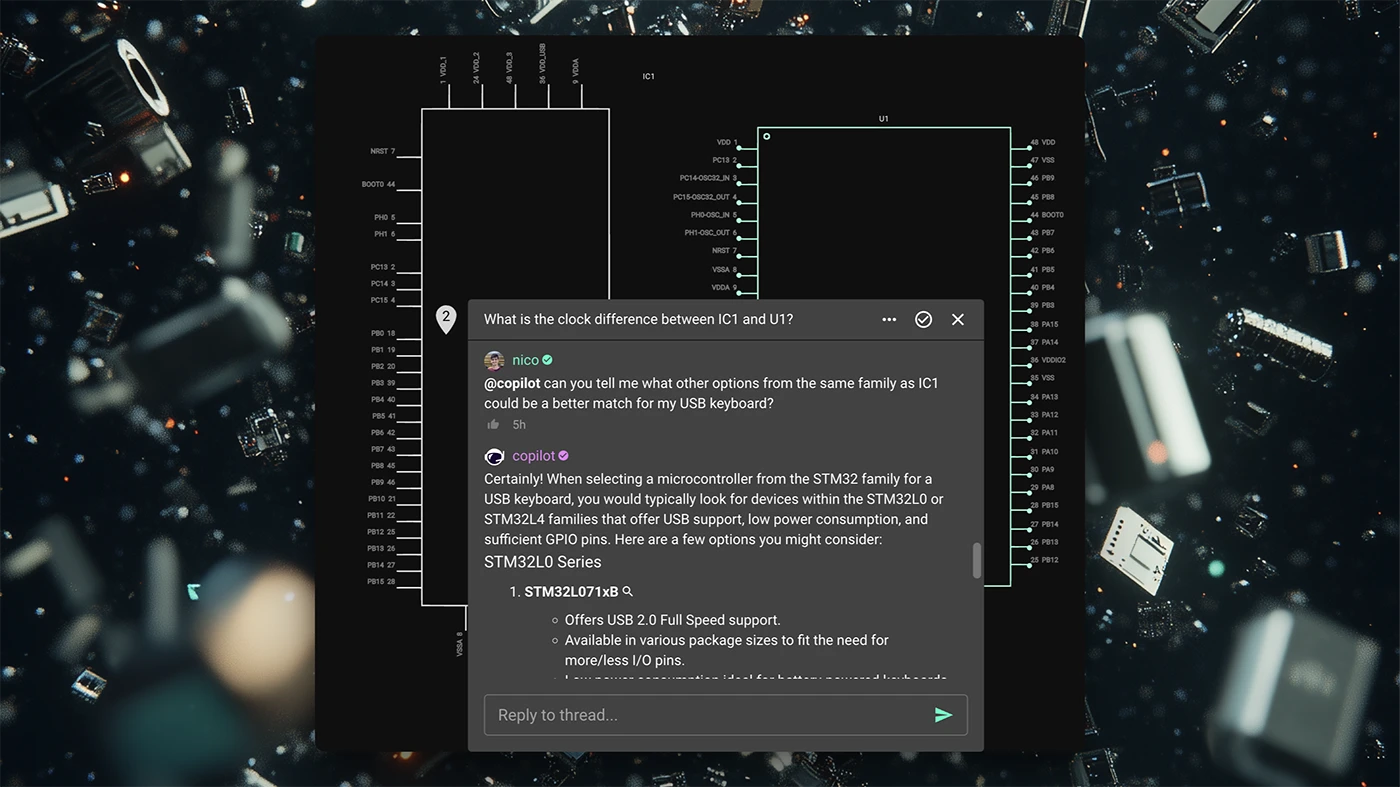
First, let’s define what a prompt is. Copilot prompts are natural language inputs given to a custom-trained large language model (LLM) specifically designed to understand hardware, electronics circuit, PCB design and layout.
For example, if the prompt is "Calculate the load capacitors for Y1", the model will generate an answer in a human-like manner based on the prompt. Remember, Copilot has the context on what you’re working on. Copilot can see your:
Because Copilot lives inside the PCB design tool, it provides direct feedback, advice, and analysis, and with your approval - it can take action, through a simple chat interface. With just a press of a button, Copilot can connect components together.
Spread the word and share your favorite prompts on our Slack Community.
{{top-copilot-prompts-v1}}